How to Grow Beets in Raised Beds for a Bountiful Harvest
If you’ve ever tried growing beets, you know how they can quickly become one of your favorite vegetables. Their rich colors, sweet earthy flavor, and the way they brighten up a plate—what’s not to love? I’ve been gardening for over a decade now, and in that time, beets have earned a special place in my garden. They’re not just delicious and versatile; they’re also packed with nutrients, making them a must-have in any vegetable garden.
When I started gardening, I needed to be more knowledgeable about growing beets. But through much trial and error, I’ve learned what works and what doesn’t. And let me tell you, growing them in raised beds was a game-changer for me. I’d love to share some of my hard-earned tips with you so that you can enjoy a successful beet harvest.

My Experience: Learning by Doing
My Experience: Learning by Doing
In the early days of my gardening journey, I made many mistakes. Believe me! I planted my beets directly in the ground and ended up with stunted, misshapen roots more times than I’d like to admit. But I didn’t let those setbacks stop me. I kept experimenting and trying different methods until I found what worked best. When I finally switched to raised beds, everything clicked. The controlled environment allowed me to fine-tune the soil, and my beets started thriving like never before.
Growing Beets in Raised Beds
Choosing the Right Location
Beets need plenty of sunlight to grow well. I always make sure my raised beds get at least 6 hours of direct sunlight each day, ideally in the morning. This helps the soil warm up faster, which is important for beets. One thing I’ve learned over the years is the importance of having easy access to your plants. Make sure your raised bed is in a spot that’s easy to reach, whether you’re watering, weeding, or harvesting. It’s one of those small details that makes gardening so much more enjoyable.

Building the Raised Bed
For the bed itself, I’ve used everything from untreated wood to stone. Whatever material you choose, just make sure the bed is at least 12 inches deep so your beets have plenty of room to grow.
You can make it 16 inches deep to produce any type of vegetable you want. Usually in my garden, a 4×8-foot bed works perfectly. It’s big enough to grow a decent amount of beets but small enough that I can easily reach the center without stepping inside.

Soil Preparation
Beets do best in loose, well-draining soil with a slightly acidic to neutral pH (6.0-7.0). They don’t like waterlogging. So, You mostly make your soil loose.
Here is a basic soil mix for Beets:
- 50% Topsoil: This forms the bulk of your growing medium.
- 30% Compost: Compost adds essential nutrients and helps retain moisture.
- 20% Perlite or Sand: For drainage and aeration. Perlite also releases minerals slowly. So your plants get enough minerals for them.
Timing to Plant
Beets are cool-weather crops, so I usually plant them in early spring or late summer for a fall harvest. One of the great things about raised beds is that they warm up faster than the ground, so you can get a head start on the season.

Selecting and Planting Seeds
I’ve tried many different beet varieties in my Garden. I have some beet varieties listed. Hope you will like them also. Here are a few that have done particularly well in my raised beds:
- Detroit Dark Red: This classic variety is a winner with its deep red color and sweet flavor.
- Chioggia: An Italian heirloom that’s as beautiful as it is tasty, with red and white rings inside.
- Golden: If you’re looking for something a bit different, try Golden Beets. They have a milder, less earthy taste.
Preparing Seedling
It is important to make the right seedlings for your seeds. I don’t like to make seedlings separately of beetroot. They are very shock-sensitive. It is not good for the plants to produce seedlings in other places and plant them in a raised bed or garden. So we will sow the seeds in the permanent place of our plant.
Direct sowing beetroots in their final spot works best. Since beets don’t take well to transplanting, this can harm your plants.
Keep your soil well-prepared and loose before sowing, allowing the seeds to germinate comfortably.
Keeping the bed consistently moist and ensuring good sunlight helps the seeds sprout into strong and healthy plants.
After 5-7 days, seedlings will come out from the soil.

Fertilization
Even though beets aren’t heavy feeders, they do benefit from a bit of a nutrient boost. I like to mix in organic compost, bone meal, and blood meal. This combination has given me consistently good results over the years. I have done a lot of experiments with my beats in many years of beet farming. I also have my favorite fertilizer mix for beets.
My Fertilizer Mix:
- Organic Compost: 2 cups per square foot
- Bone Meal: 1 cup per square foot (for phosphorus)
- Blood Meal: 1/2 cup per square foot (for nitrogen)
- Potash: 1/4 cup per square foot (for potassium)
Mix the fertilizers into the top 6 inches of soil before planting. If you want, you can spread fertilizer over the soil before the beets mature, this will help increase the yield of the beets. To do that take all of the fertilizer above i mentioned and make a mix. Now Take the mix and spread that at the rate of 1/2 cup per square foot.
Planting Depth and Spacing
I always plant my seeds about 1/2 inch deep. Space them 2-3 inches apart in rows that are about 12 inches apart. Once the seedlings are up and about 2 inches tall, I thin them out to 4-6 inches apart to give each beet room to grow.
Watering and Mulching
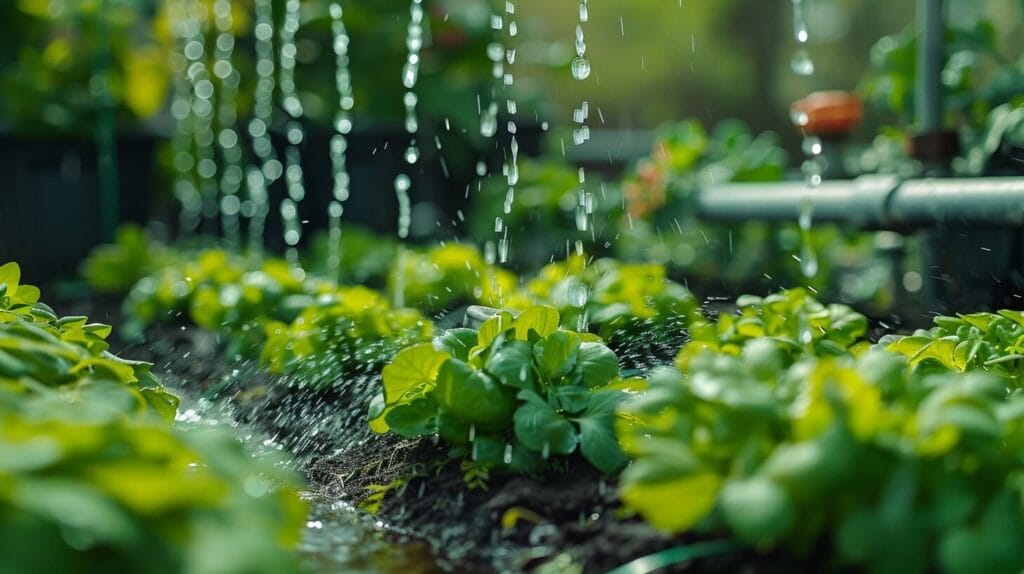
Watering: Beets need consistent moisture to develop properly. I water deeply about once a week, making sure the soil is moist to a depth of at least 6 inches. But be careful not to overwater—too much moisture can lead to root rot, which is something I’ve learned the hard way.
Mulching: A layer of organic mulch, like straw or shredded leaves, helps retain moisture and keeps the soil temperature stable. It’s a simple step that pays off big time.
Thinning and Weeding
When your seedlings reach about 2 inches tall, it’s time to thin them out. Space them 4-6 inches apart so the roots have plenty of room to grow. Keeping your bed weed-free is crucial. I find hand-pulling weeds is easiest, but you can also use a hoe—just be careful not to disturb the beetroots.
Fertilising During Growth
About halfway through the season, I like to give my beets a little boost with a side-dressing of compost or a balanced fertilizer (10-10-10). But don’t go overboard with nitrogen—too much can result in lots of leafy greens but small roots.
Pest and Disease Management
Beets are sensitive to disease. They are generally hardy, but like other crops, they can be victim to pests and diseases. They can get disease very easily unless they are cared for a little bit better. I faced the problems and diseases of my plants. I tried many tricks in my garden and plants to prescribe from those insects and diseases, So I can easily tell you how you can do the same. Here’s what I’ve learned about how to handle them.
Common Pests:
- Flea Beetles
- Leaf Miners
- Aphids
- Downy Mildew
- Cercospora Leaf Spot
- Cutworms
Those are the common diseases of beets. There are more diseases of beats. I described it in my This Blog.
Now I am talking about my experience with that disease and how you can face it. So let’s talk about:
Flea Beetles
These tiny, black beetles are the most common pests I have faced. They leave small holes in the leaves, which can stop growth if left unchecked. The best way I’ve found to protect them is to cover them early with a small gaped net in the season to prevent them from laying eggs. If they’ve already invaded, a light spray of neem oil works wonders. Put 10 ml of neem oil into a litter of water and spray it every three days. I also used dishwashing liquid soap for 10 ml when I didn’t have neem oil.
Leaf Miners
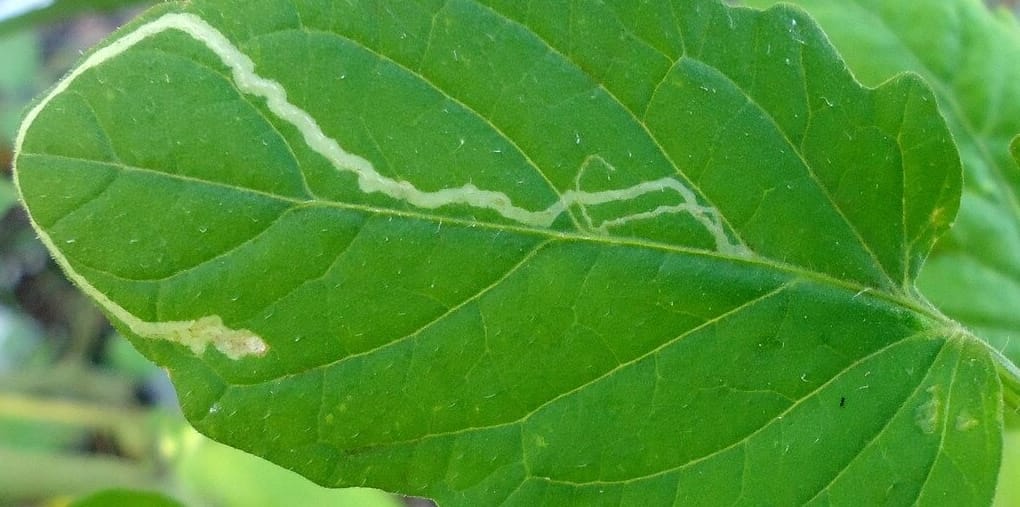
Leaf miners are small insects that lay eggs inside the leaf. After some days, larvae came out and mined the leaves and ate the chlorophyll of the leaves. It leaves a trail of damage. You’ll notice white or brown winding lines in the leaves. Removing and destroying the affected leaves is the quickest solution to deal with them. If you are 2conscious of your plant’s leaves, prick the affected leaves with your fingers to kill the insects inside. It is effective only when fewer leaves are affected. Telling that this is my own opinion you may not like it. You can also use floating row covers to prevent adult flies from laying eggs on your plants. You can also use some yellow Sticky traps to stop them.
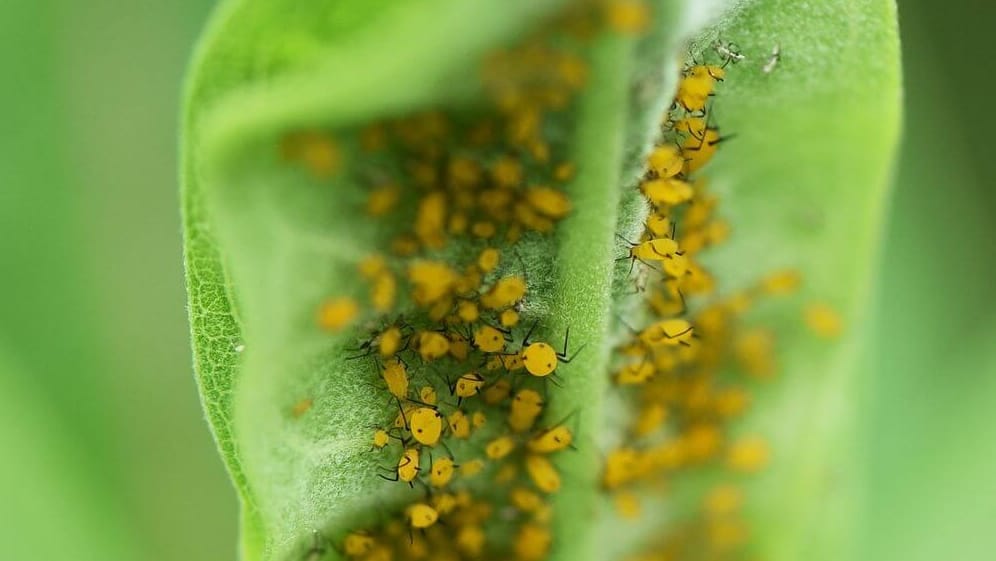
Aphids
Aphids are tiny, soft-bodied insects that cluster on the underside of leaves and suck the sap from the plant. There are many types of Aphids and they make damage different types of vegetables. If you see curled or yellowing leaves, aphids could be the culprit. I have a simple and organic tric that’s always worked for me which is a spray of soapy water. Put 10 ml of liquid sope into 1 L water. Mix it well and spray it under the leaf. Ladybugs are also natural predators of aphids, so you can introduce them to your garden. But in my case, it is difficult to find them.
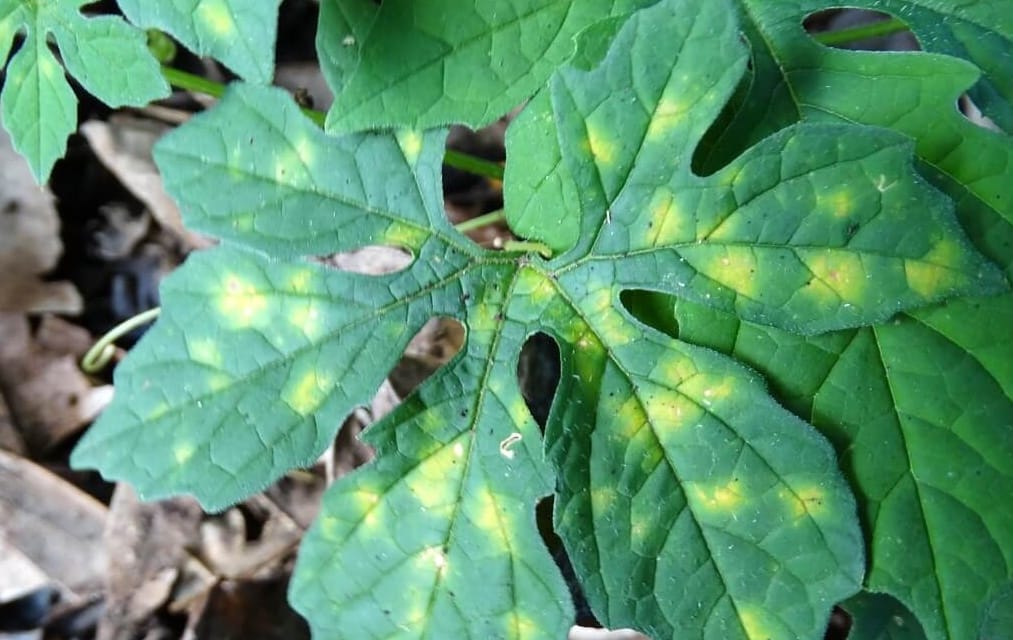
Downy Mildew
His is a Fungal disease. This causes yellow or white patches on the leaves, eventually leading to browning and wilting. Downy mildew thrives in damp conditions, so I water my beets early in the day and space them properly for good airflow when planting in the raised bed. So as a result less moisture around the plant and less chance of the disease. If you spot it early, removing affected leaves can help control the spread. It’s the best way to control Downy Mildew.

Cercospora Leaf Spot
One of the most common beet diseases, Cercospora Leaf Spot causes dark, circular spots on the leaves. It thrives in warm, wet conditions. To prevent it, I always try to avoid overhead watering and space my plants to allow for better air circulation. All the suggestions are almost like downy mildew. If it shows up, I remove infected leaves and apply an organic fungicide like copper spray.

Cutworms
These pesky caterpillars cut down young beet seedlings at the soil line, which can be devastating in the season. A trick I’ve used for years is placing collars around the seedlings. You can make them from toilet paper rolls or cheap plastic Single-use Cups. Make a hole under the cup and when the siblings are small put the cup in the soil so the Cutworms will never touch the soil and they can’t harm them This barrier stops cutworms from reaching the tender stems.
By keeping an eye out for these pests and diseases and using a few preventive measures, you can protect your beet plants and ensure a healthy, good harvest. Just remember, the key is early detection and quick action!

Harvesting Beets
Your beets will be ready to harvest when they’re about the size of a golf ball to a tennis ball, usually 50-70 days after planting. I prefer to harvest them when they’re smaller, as they’re sweeter and more tender. Gently loosen the soil around the beets with a garden fork and pull them out by the tops. Be careful not to damage the roots. You can store them for some weeks. To do that, After harvesting, I cut off the tops, leaving about an inch of stem, and stored the roots in a cool, dark place. They’ll keep them properly stored for several weeks.
My Top Tips for Success
Don’t plant beets in the same spot every year. Crop rotation helps prevent pests and diseases from building up in the soil. Beets do well alongside onions, lettuce, and cabbage. These companions help deter pests and improve overall plant health. Gardening is all about learning and trying new things. Don’t be afraid to experiment with different beet varieties to see what works best in your garden.
Conclusion
Growing beets in raised beds has been one of the most rewarding experiences in my gardening journey. There’s nothing quite like the satisfaction of pulling a beautifully formed beet from the soil, knowing that you nurtured it from seed to harvest. I hope these tips help you enjoy a successful beet harvest, whether you’re a seasoned gardener or just getting started. Here’s to a bountiful and delicious garden!

