It is true that gardening is time-consuming, but you can grow good crops in less time if you want. Many people don’t have a big, good garden or don’t have the space or time to do it. My suggestion for them today. Today I am going to tell you how and which crops you can plant in less time and reap the maximum harvest.
I am a gardener. I have been tending my garden for 11 long years. Today I will tell you about my experience. Apart from that, I will tell you how to grow more crops in less space and in less time. And at the end of the article, I will give some tips to help you. So let’s start.
If you want to grow crops in less time, then you must choose crops that are fast-growing and very good. And good seed you will get from a good seed company. Good-quality seeds should be bought. You can also buy seeds from the local market if you want, but their quality will not be better than good packet seeds.

I can tell from my long experience which crops can give a better yield in less time. Some of them are included below:
1. Microgreens
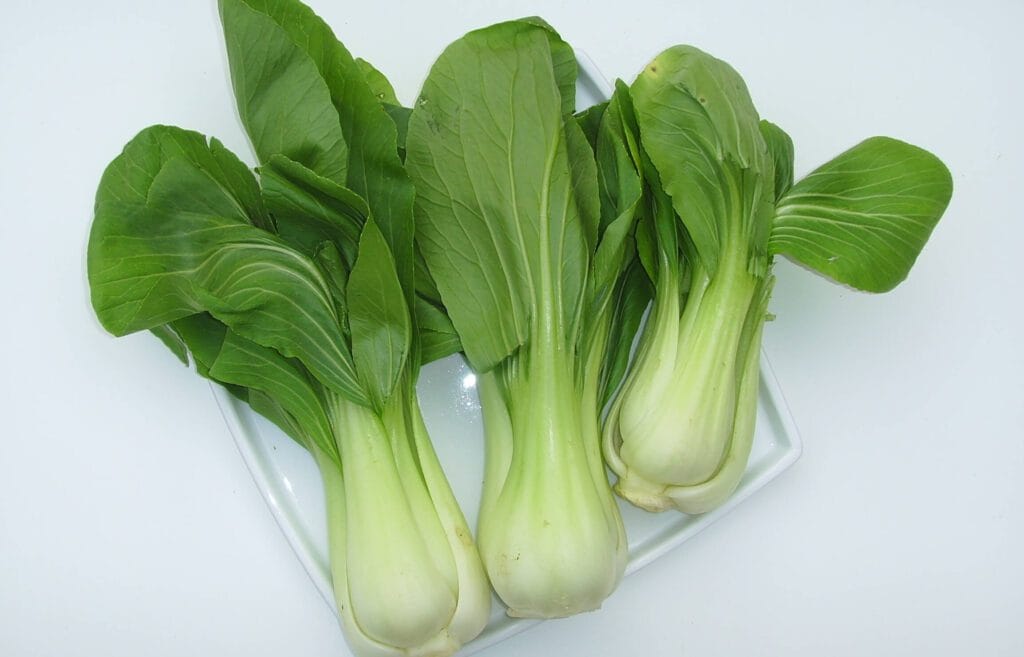
2. Baby bok-Choy
3. Lettuce
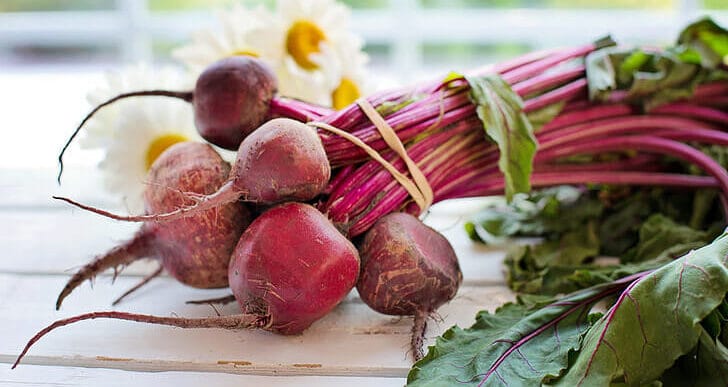
4. Baby beetroots
5. green onion
Everything written here is cultivated and believed in by me. These are the best crops that can be planted in less space and in less time.
By reading this, we will know how you can plant these crops in your garden or balcony. So let’s jump into it!

Micro Greens
Microgreens are best for your kitchen garden. If you want, you can grow them in your home with a little light or artificial light. Different types of microgreens can be produced. Some of the best, in my opinion are:
• sunflower
• Beans
• Radish
• Broccoli
My experience in planting trees
I have learned a lot in the long journey of 11 years. I have made many observations. Crops are grown in different ways. In my opinion, the best way to plant Microgreens is as follows:
• Better-quality seeds should be collected first. Remember that a good crop comes only from good-quality seeds. So you must focus on collecting good-quality seeds.
• Microgreen farming does not require much fertilizer. They obtain their nutrients from seeds and have short lifespans. All they need is moisture. So I use cocoa dust as a potting mix, which is very light and great for Microgreens.
• Take a pot. Microgreen’s roots do not go too deep into the soil. So take a little less deep pot. The pot should be 2-3 inches in height and 1 foot in width. You can resize it to your liking.
• Spread the seeds evenly in all places. Finally, sprinkle some water. There is no need to put soil on it. By doing this, after cutting the microgreens, the soil will stick to them.
• Take care that the soil does not dry out. For that, cover the top with a lid. Make some holes in the lid. Or fungus will grow in it.
• You can plant Microgreens without complete soil if you want. For that, the seeds should be soaked for 12 hours. Take a pot with a depth of 2–3 inches. Spread a tissue or towel on it. Spread the seeds on it and sprinkle some water on it.
• Your Microgreens will sprout in 3-5 days and be ready to eat in 8–14 days. Cut 1 inch above the base and deposit it in your basket.
Now they are ready to go on your salad. Scoop it up on your spoon and put it in your mouth. You will find them sweet and have a flavorful taste. Enjoy!

Baby Bok-Choy
Baby bok choy is a small variety of Bok-Choy that can be grown in a very short time. It can be grown by almost anyone, and its taste is unmatched. Now we will know how to grow baby Bok-Choy.
• To plant baby Bok-Choy, you must first collect seeds. Indeed, you will gather the seeds of the good variety.
• Take a hatching tray and spread a soil mix made up of 50% organic manure, 50% cocoa dust, and some perlite. You can also use other organic fertilisers here.
• Make a hole in each cup of the tray and place 2 Baby Bok-Choy seeds in it.
• Cover the top with a little soil.
• Water well.
• Within 5-7 days, the seedlings will start sprouting.
• At the age of 15 days, they are ready to plant in your garden, tub, or raised bed.
• Prepare your soil. For planting in rice beds or gardens, prepare the soil with 2 kg of Vermicompost, 1 kg of coco dust, and a little perlite per sq. ft.
• You can apply 5-7 per square foot. But according to me, you can plant 8–9 trees per square foot. By doing this, you will be able to get more yield in less space.
• Gently lift the seedlings from the tray and plant them in the hole. Place one plant in each hole and remove the weak plant.
• Water well. Water should be given 1-2 times daily. It should be seen that the water does not become too full.
• They will be edible within 25–31 days. You can make it bigger if you want. But according to me, it is better to harvest them at this age. The taste and beauty of the crops are good.
I have another article where I detail my experience on how to grow Bok Choy.
Click here to learn more.

Lettuce Leaf
Lettuce leaves are a type of leaf that is eaten as a salad. It is not just a leafy vegetable; it is also rich in vitamins and minerals. Now we will know how in a very short time.
Lettuce leaves can be cultivated in a small portion of Space. So we need to maintain all of the things like:-
• To grow lettuce leaves, you first need to collect good-quality seeds.And good companies will give you good seeds.
• The first step in gardening is to prepare seedlings. We will produce seedlings in a hatching tray. Fill the trays with cocoa dust, spread the seeds on them, and sprinkle some more cocoa dust on top.
• Spread the water well. Water should be given twice a day.
• Within 4–7 days, the seeds will start germinating.
• After 2 weeks of germination, the seedlings should be lifted from the tray and transplanted separately.
• You can plant 6–9 seedlings per square foot. Planting densely will prevent weeds from growing.
I• t can be harvested at the age of 25–30 days.
• If you want, you can read my complete article on lettuce leaves. I have written everything based on my experience with lettuce, starting with planting, fertilisers, and pesticides.
I think you will benefited.

Baby Beetroot
Beetroot, also known as table beet or garden beet, is the root part of the beet plant, which is eaten as a vegetable. It is very tasty and nutritious. Its taste is incomparable. Most people eat it as a pickle. But it can be eaten in many other ways.
Below is my experience with BeetRoot:
• As always, the first step is seed collection. So I didn’t take it anymore. If you want, you can know the seed preparations from above.
• Seedling production: Like all other plants, beetroot can produce plant and tamarind seedlings, which are mentioned in my Beetroot detailed blog. But we don’t like to make seedlings of beetroot. They are very shock-sensitive. It is not good for the seedlings to make seedlings in other places and plant them in a raised bed or garden. So we will sow the seeds in the permanent place of our tree.
• Sow the seed thickly and spread some soil over it.
• Sprinkle water well. Water should be given twice a day.
• Within 4–7 days, you will see that all the seedlings have sprouted.
• Remove the plants at such times.
You can, of course, apply your own method to it. But care should be taken not to damage the plant.

Green Onions
Green onions, or “scallions,” are a kind of young onion that is eaten when it is young. It is usually eaten as a as a whole plant. It is more crunchy and tasty.
Growing green onions is very easy. They can survive in any condition until it become 0°C. Even if they get 2-3 hours of sunlight, they can move in and out of the house very easily.
You don’t have to worry much about preparing the soil or other things.
Here are some tips for growing your green onions from my experience:
• It can grow easily in any type of soil, but try to give it a little soft and well-draining soil. The trees will be fine.
• You can grow green onions from seed if you want. But I don’t recommend it because it takes like 40–60 days. I
• So I grow green onions from the onions I get from the market. For that, you will need to collect a green onion and cut its leaf. Those will be used in cooking, and the whites must be soaked in a little water.
• After 3 days, it will start growing new leaves.
• By this time, he should be planted in the ground.
• If planting in a tub, prepare the soil with 30% soil, 30% coco dust, 40% vermicompost, and a little perlite.
• If planting in a raised bed or garden, 1 inch of fertilizer should be applied to the soil. You can use any other fertilizer if you want.
• There is no exact information on how often to plant. It is entirely up to you. But the core must be planted half an inch deep into the soil.
• After 15 days, the leaves will be big. At this time, the leaves can be harvested.
• Water soaked in vermicompost should be given once a month.
You will now get this fresh green onion every 15 days. You can add 3–4 batches of green onions if you want, which will meet your and your family’s regular needs.
Tips: These are contemporary crops. So, pests are generally kept away. However, you can spray once every 15 days by mixing 10 ml of neem oil with 1 liter of water as a preventation.
So now you have learned how to grow fruit easily in less time and in less space. Now implement it in your garden and reap its benefits. Take care of yourself and take care of your family. keep gardening.

